

Upload Obsidian images to Blob0 with Image auto upload
Configure Blob0 Image Hosting and the Image auto upload community plugin to send Obsidian clipboard images and note attachments to your public storage URL.
Connect Obsidian’s Image auto upload plugin to Blob0’s local PicGo-compatible service. Use Command+V for clipboard images or upload attachments already in the current note.
Use a Blob0 build whose Settings includes Image Hosting.
Prepare Blob0 Image Hosting
Save a storage connection with a public image URL
In Blob0 Settings → Connections, choose the S3-compatible profile for these images. Its Public URL must serve objects without login. Do not enter the S3 API endpoint or a temporary presigned link here.
Select that connection in Image Hosting
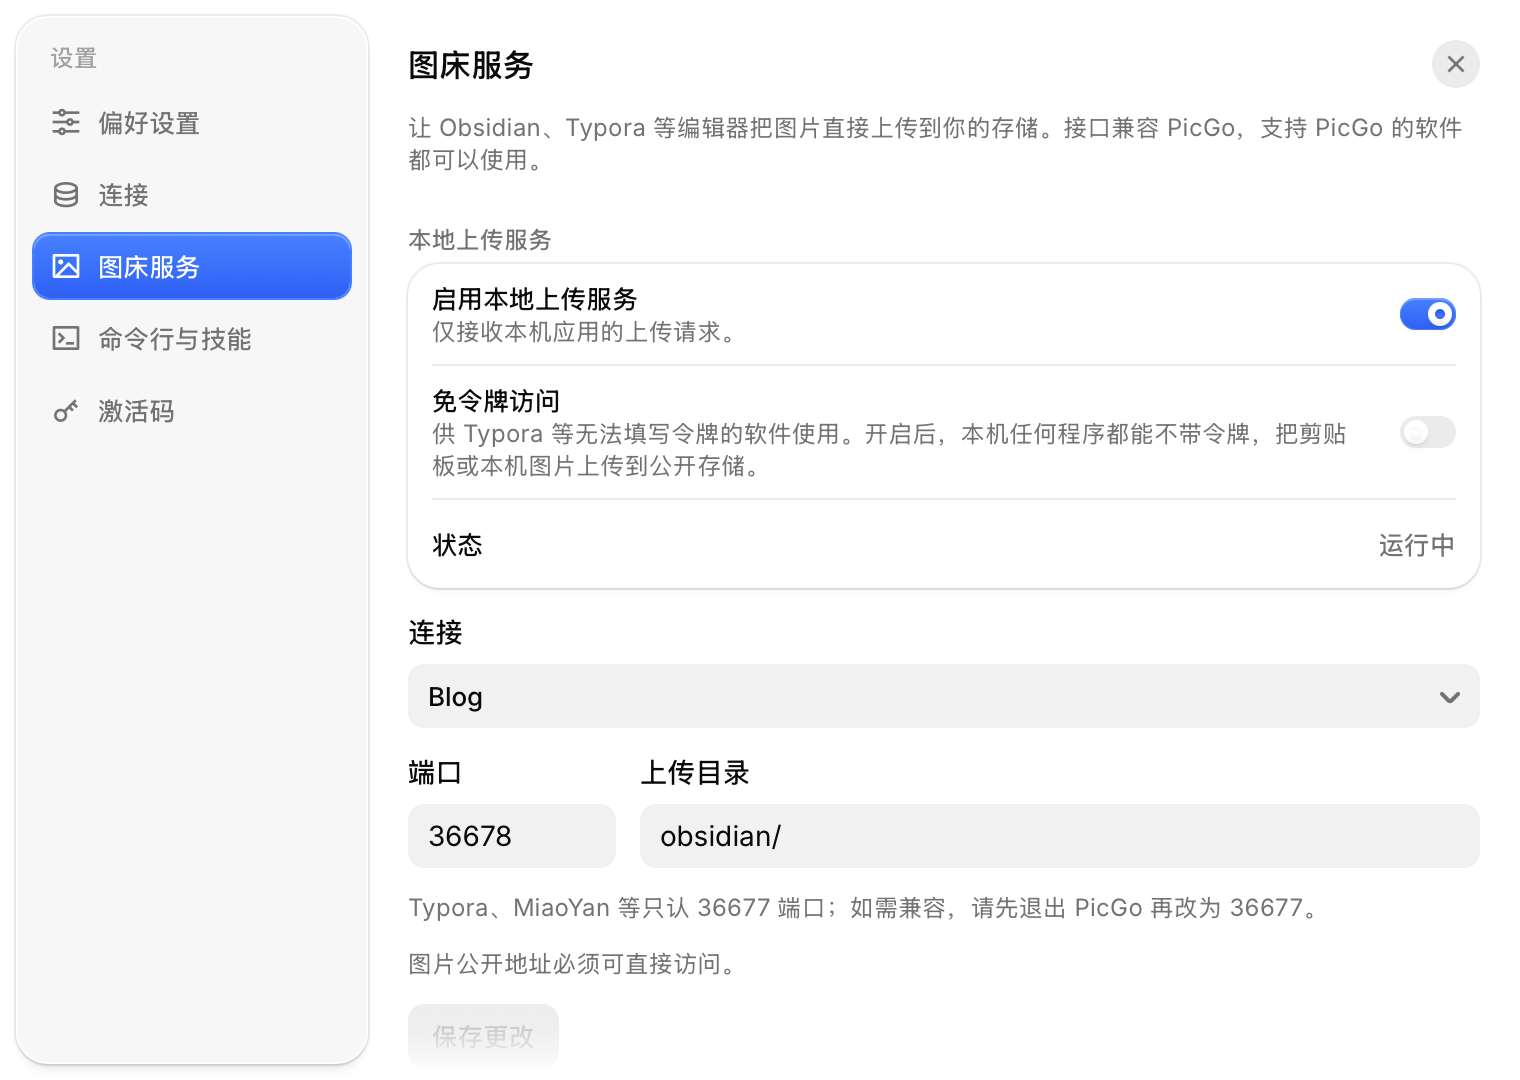
Open Settings → Image Hosting, select the saved connection, and optionally set an object-key prefix such as obsidian/. The default local service port is 36678.
Enable the local service and save
Turn on Enable local upload service, select Save changes, and confirm Status reads Running. Keep Blob0 open while Obsidian uploads.
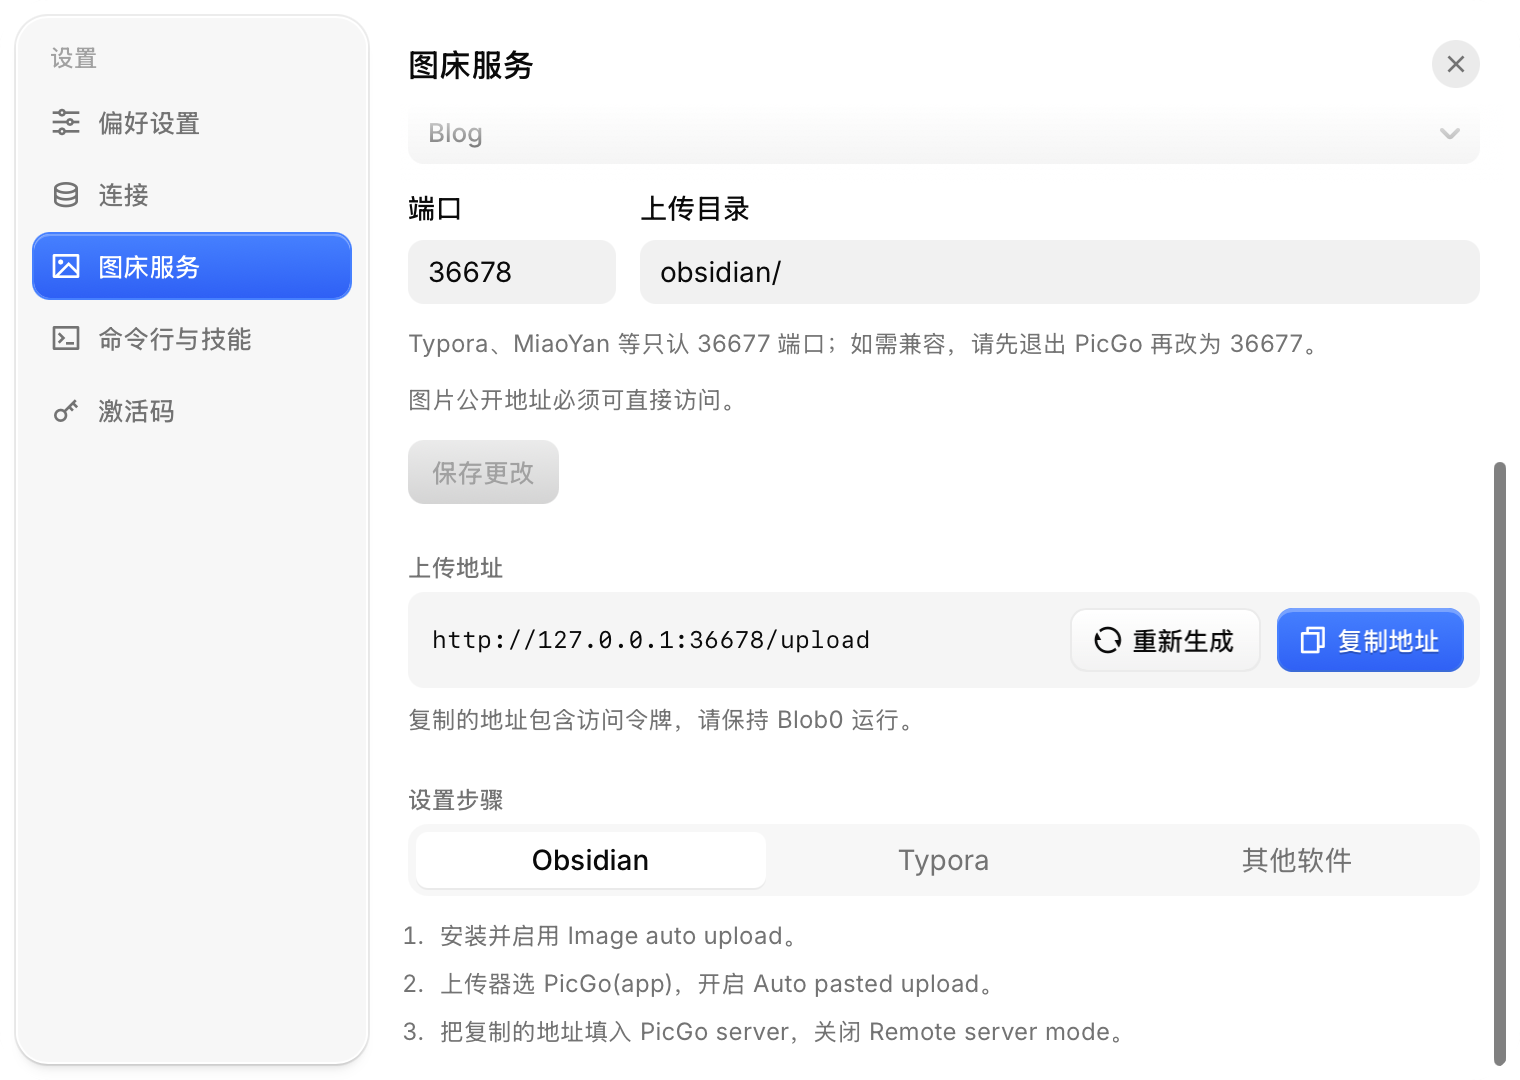
Copy the complete upload URL
Select Copy URL and paste the complete value into the plugin’s PicGo server upload route. With the default token setting, the local URL has this form:
Example local upload URL
http://127.0.0.1:36678/upload?secret=YOUR_LOCAL_TOKENYOUR_LOCAL_TOKEN is a placeholder. Copy the actual complete URL from Blob0; keep its secret private.
Install and configure Image auto upload
Image auto upload is an Obsidian community plugin by renmu123. You do not need to install PicGo; select the plugin’s PicGo(app) uploader and enter Blob0’s copied upload URL.
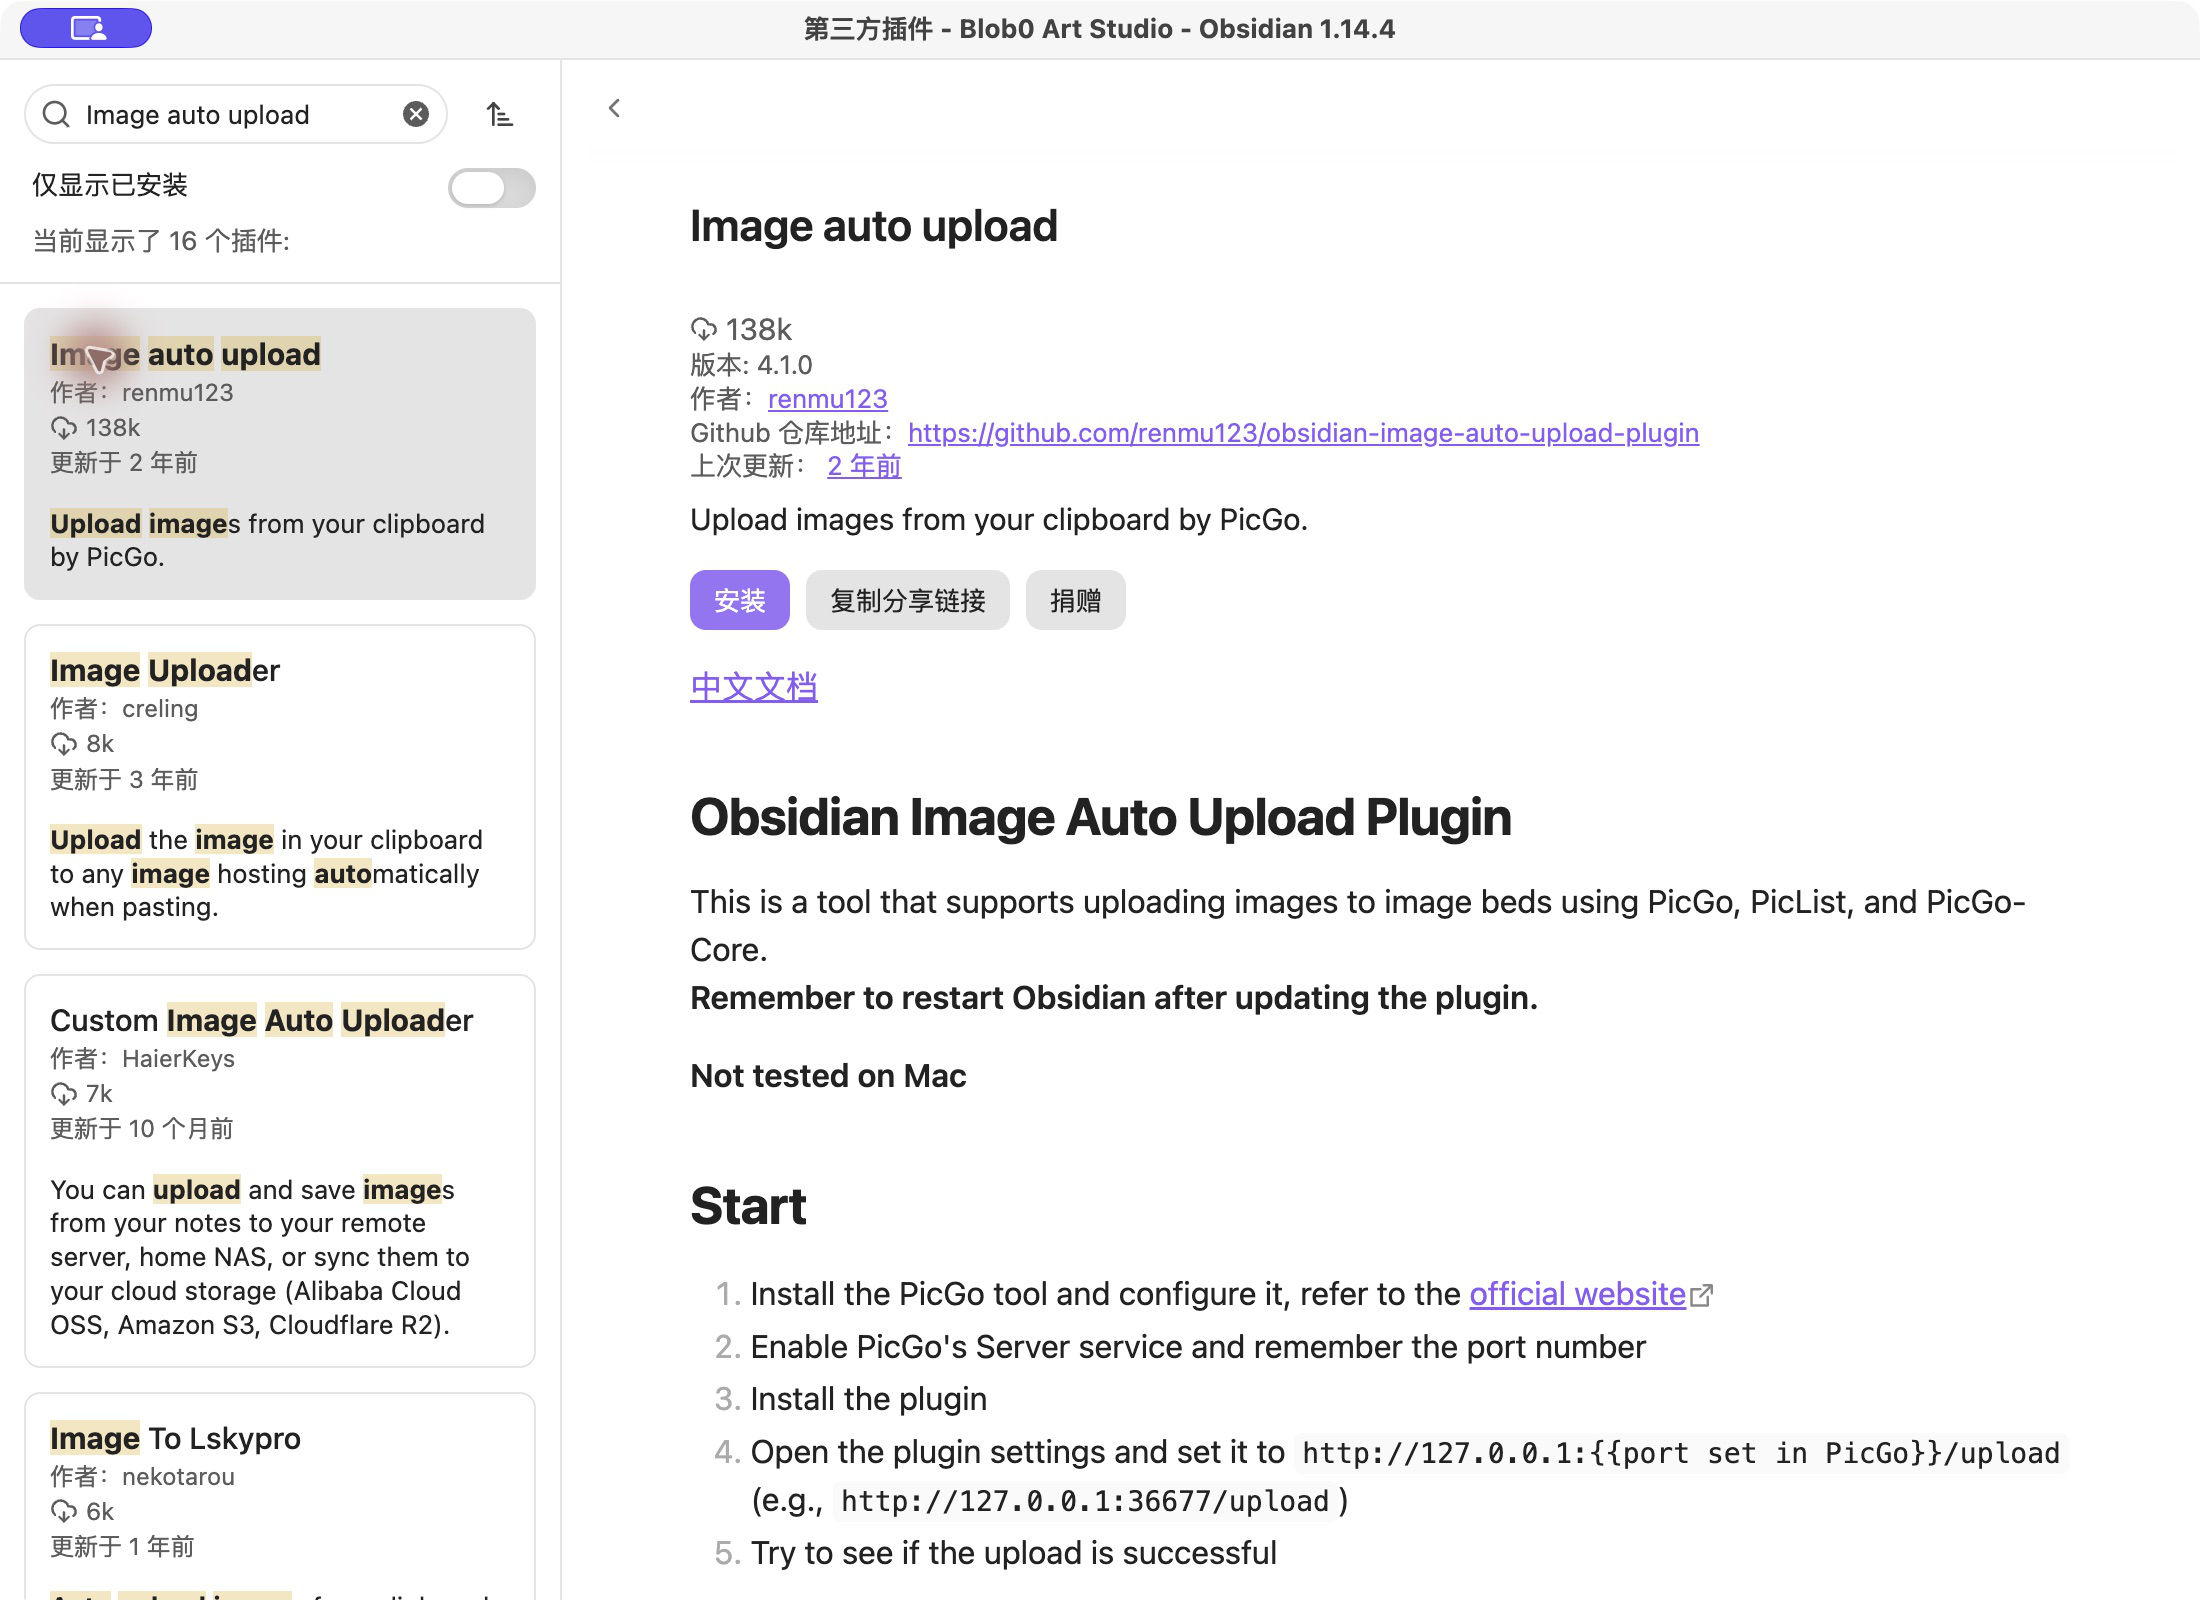
In Obsidian Settings → Third-party plugins (Community plugins), enable community plugins if needed. Select Browse, search for Image auto upload, confirm the author is renmu123, then install and enable it.
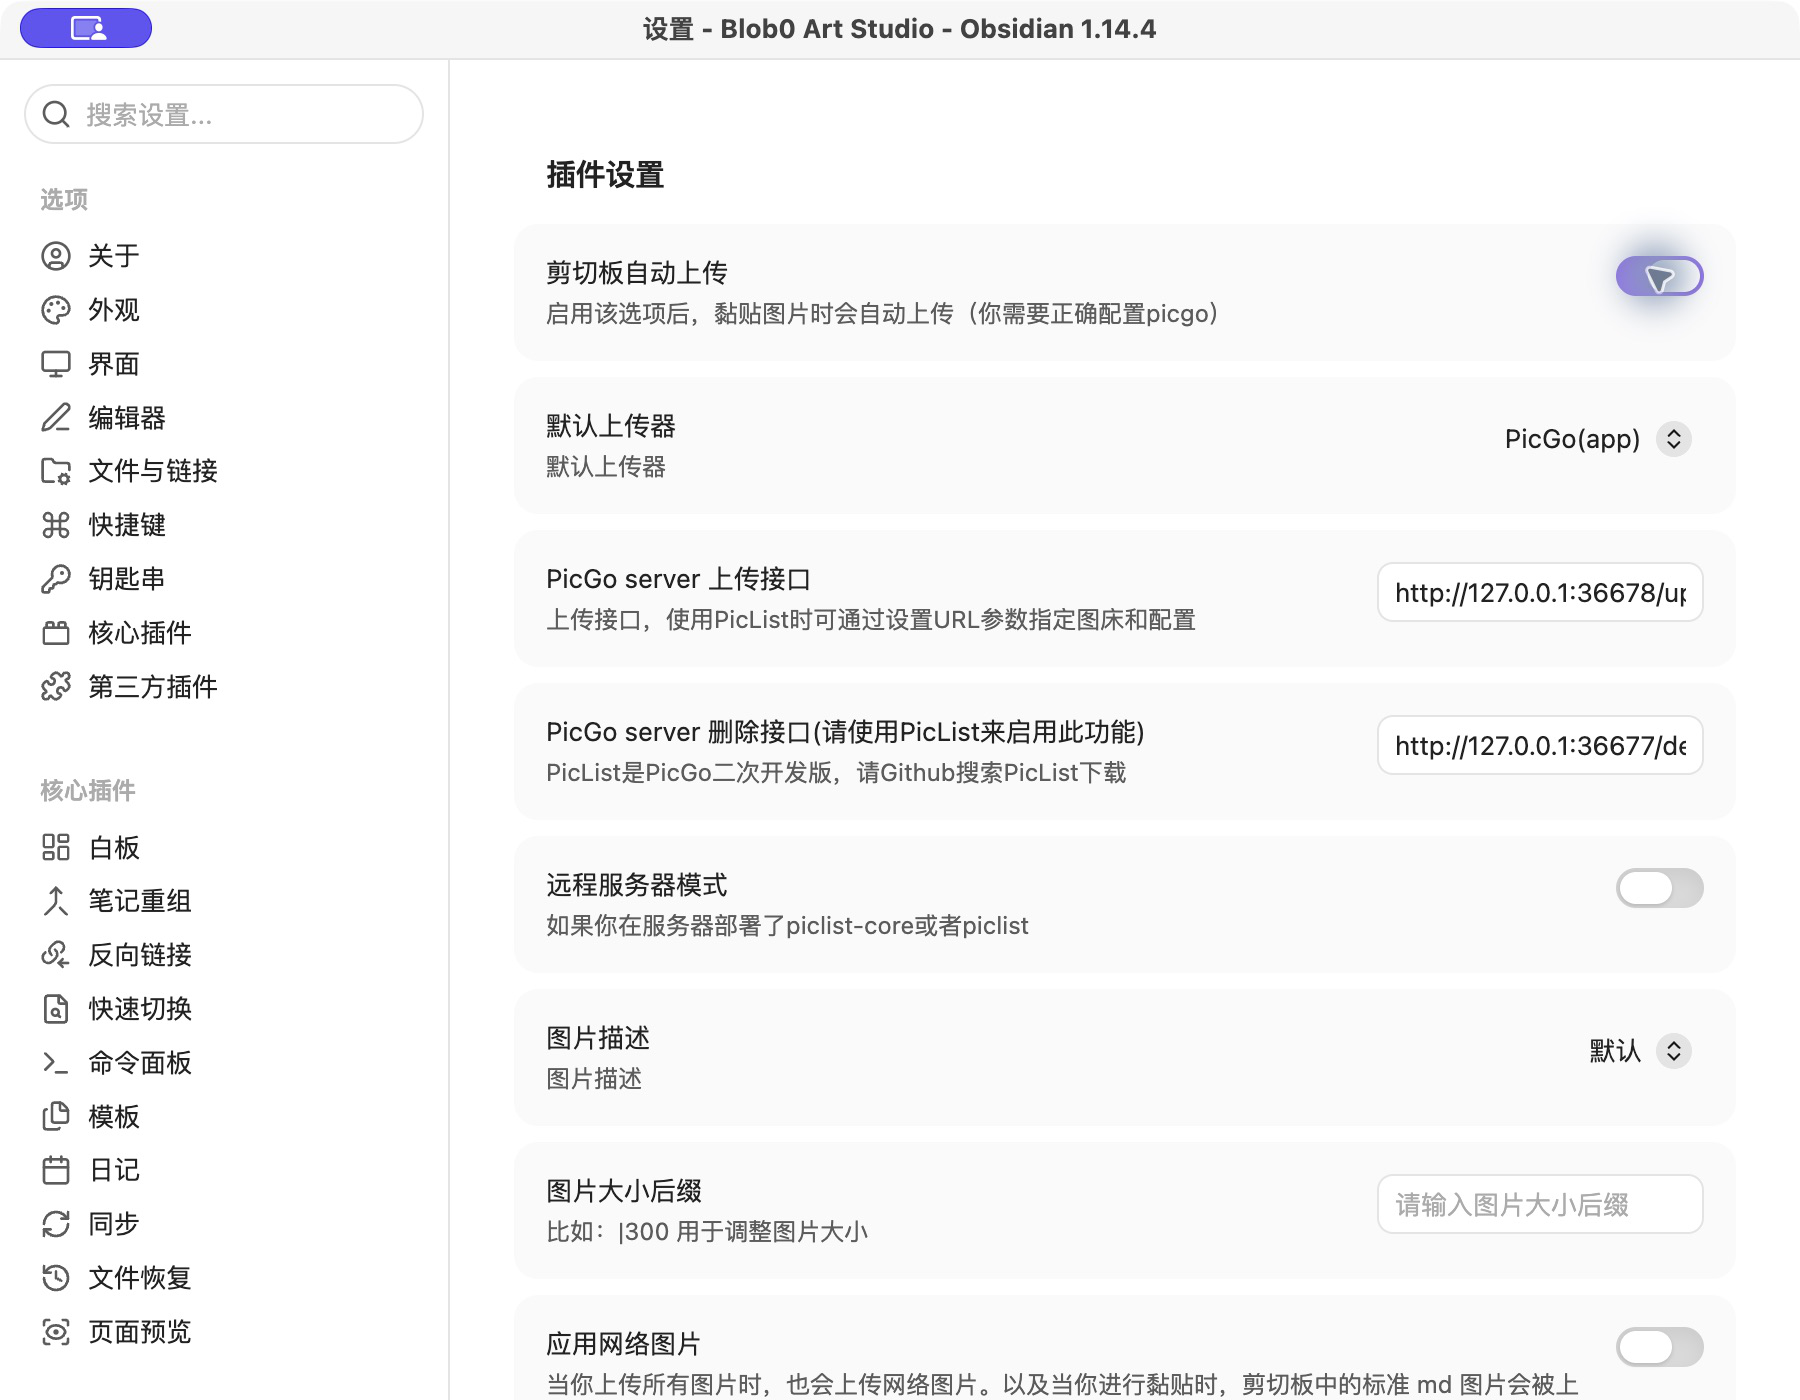
In the plugin settings, set Default uploader to PicGo(app), turn Auto pasted upload on, and paste Blob0’s complete URL into PicGo server upload route.
Turn Remote server mode off. Leave Remove source file after upload (delete-source) off to keep local attachments; this option controls whether the plugin removes source files after uploading. Keep Obsidian and Blob0 running on the same computer.
Paste an image with Command+V
Copy an image to the system clipboard, place the cursor in an Obsidian note, and press Command+V (⌘+V).
Image auto upload sends the clipboard image to Blob0. The real Cmd+V walkthrough shows the plugin’s “Uploading file...” state followed by the hosted image in the note.
To inspect the Markdown source, open the Command palette with Command+P and search for “Toggle Live Preview/Source mode”; or open the note’s More options menu and choose Source mode.
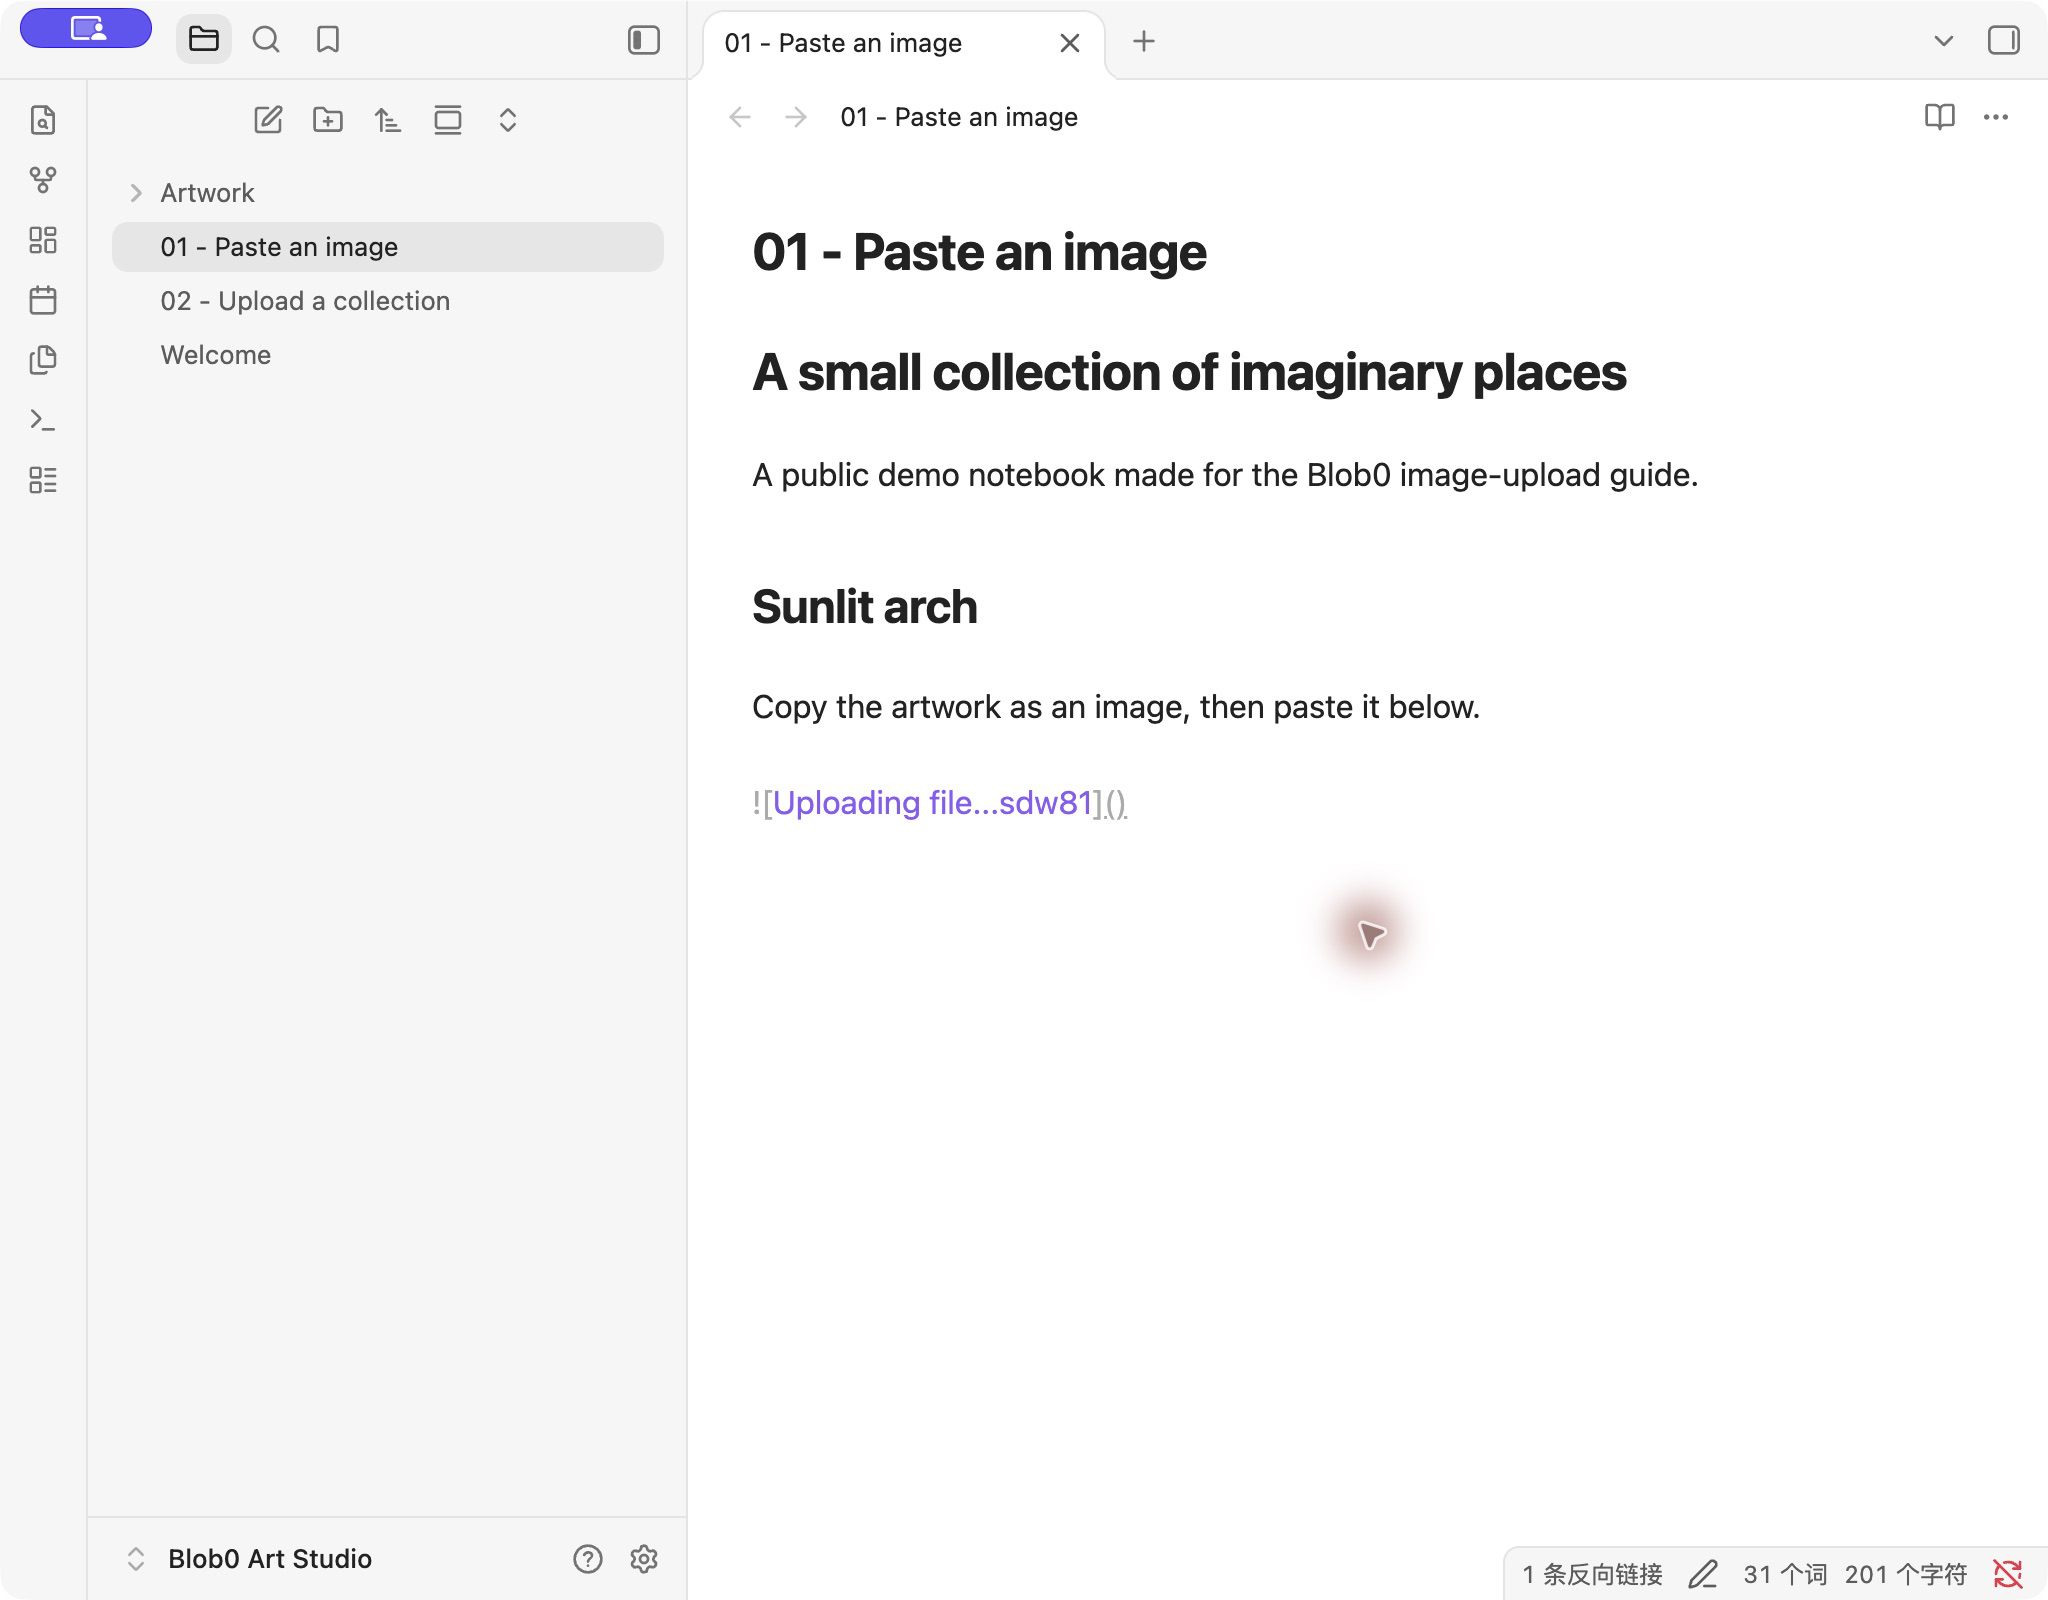
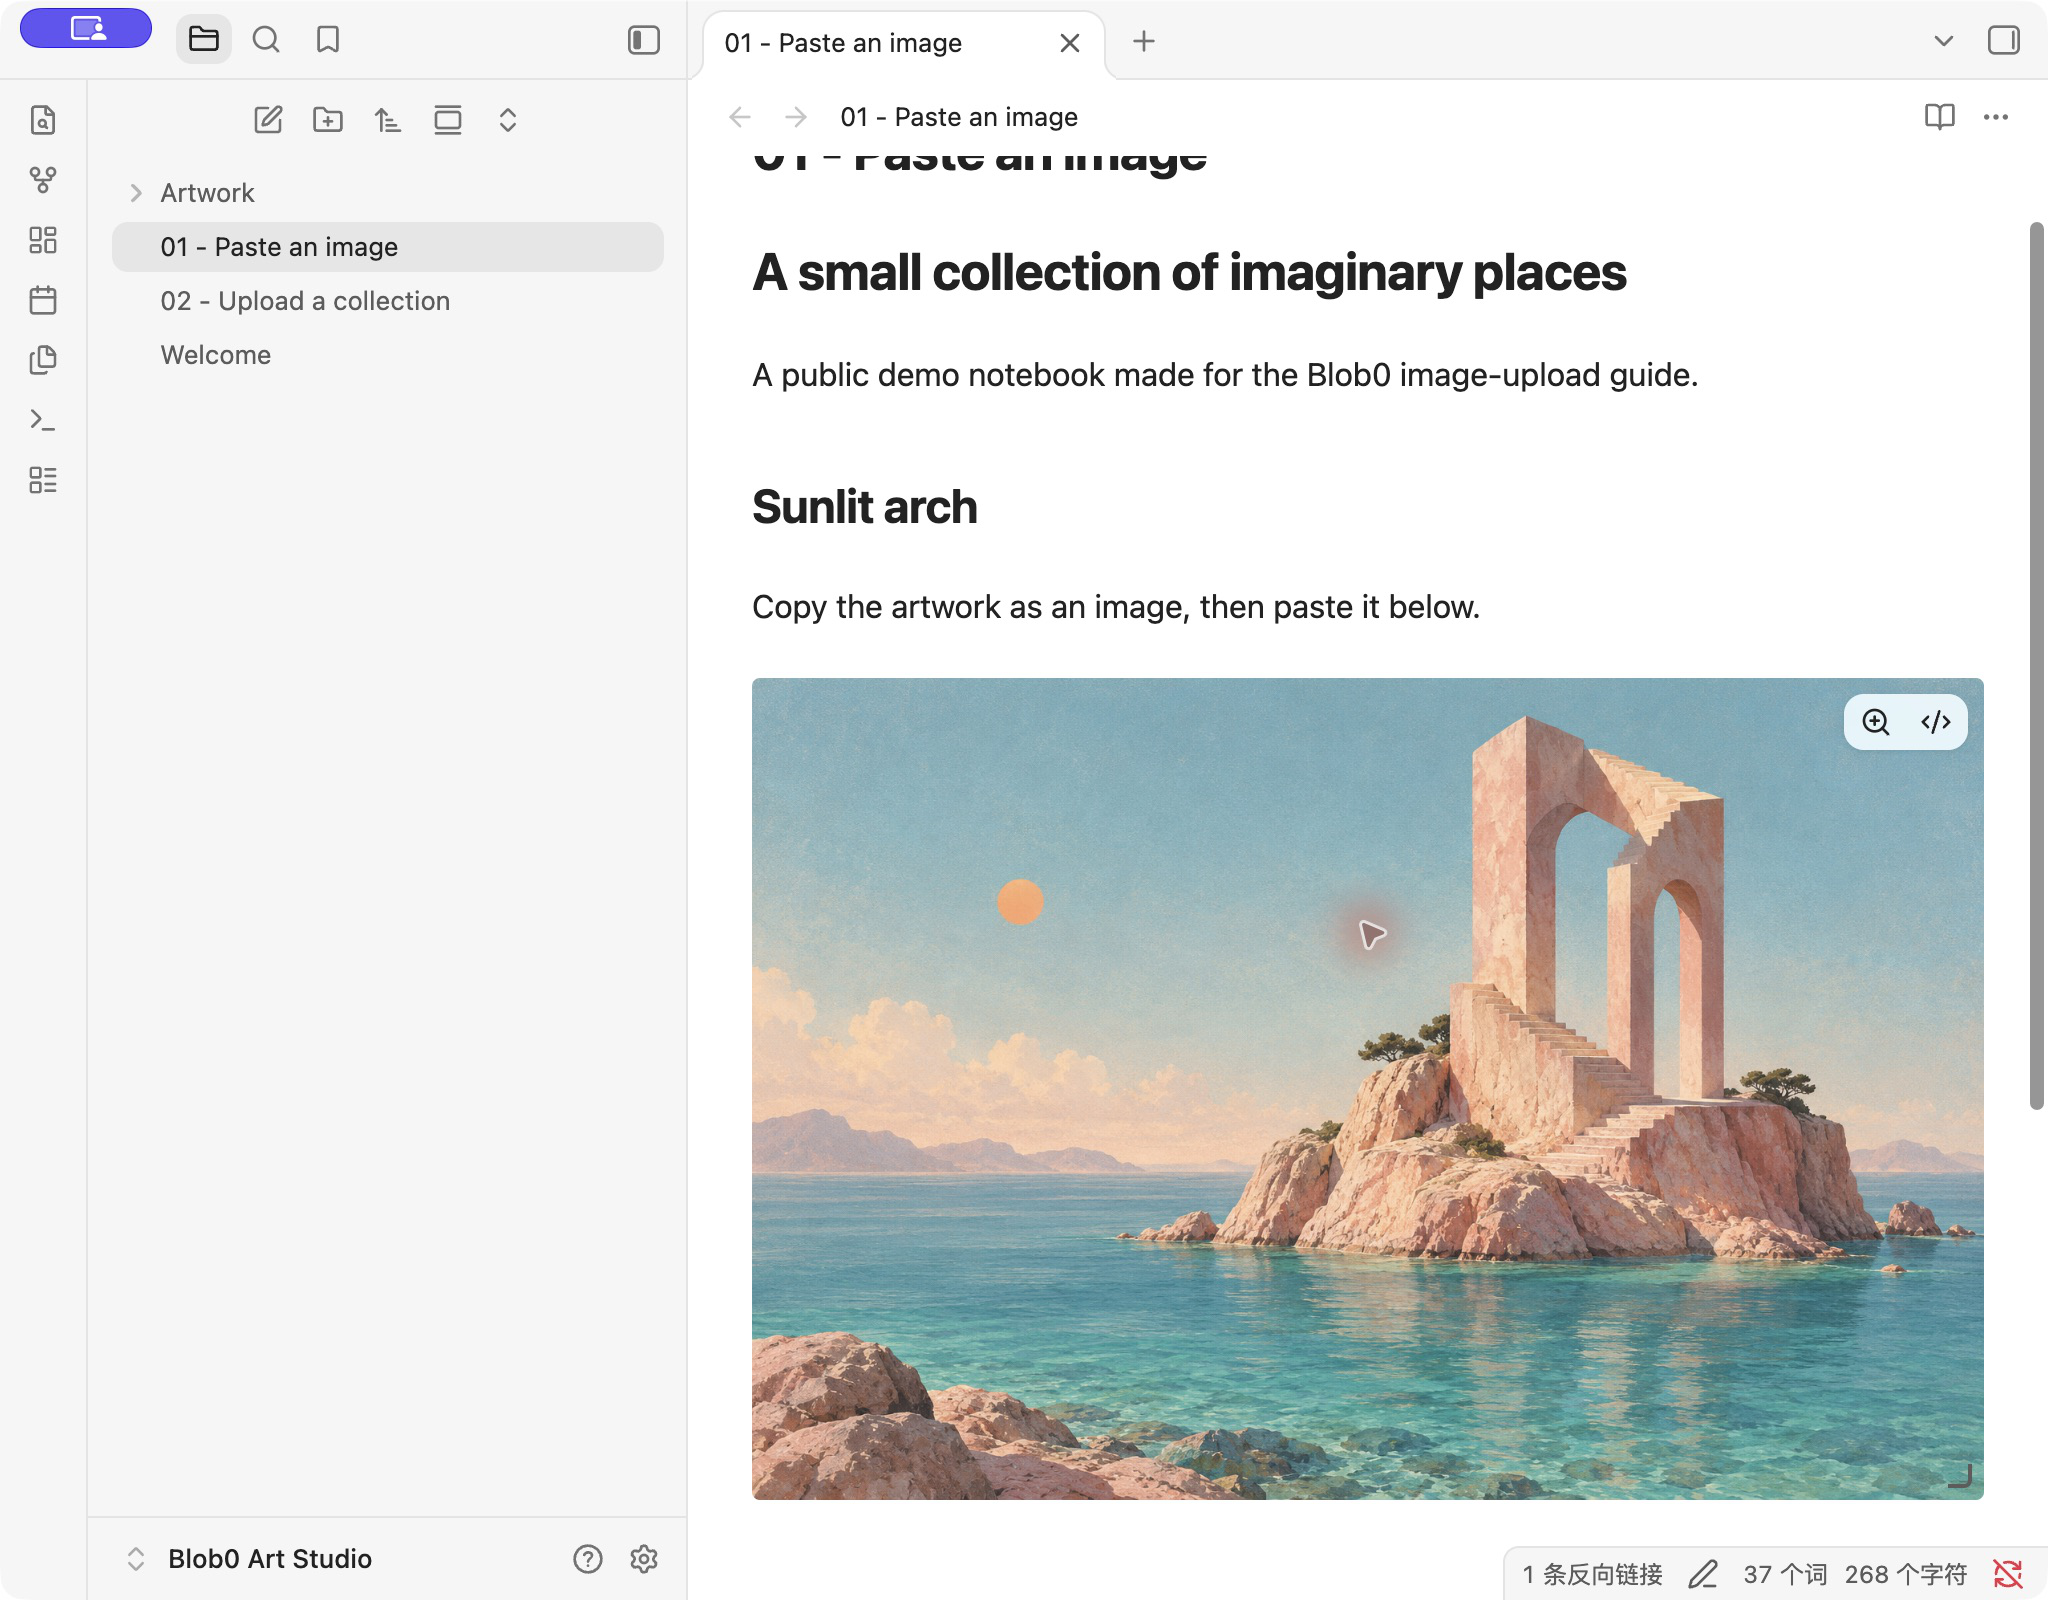
Markdown before and after upload
The note keeps a public image URL. It does not contain the local upload URL or its secret.
Before: local attachment
After: public image URL
Upload images already in the current note
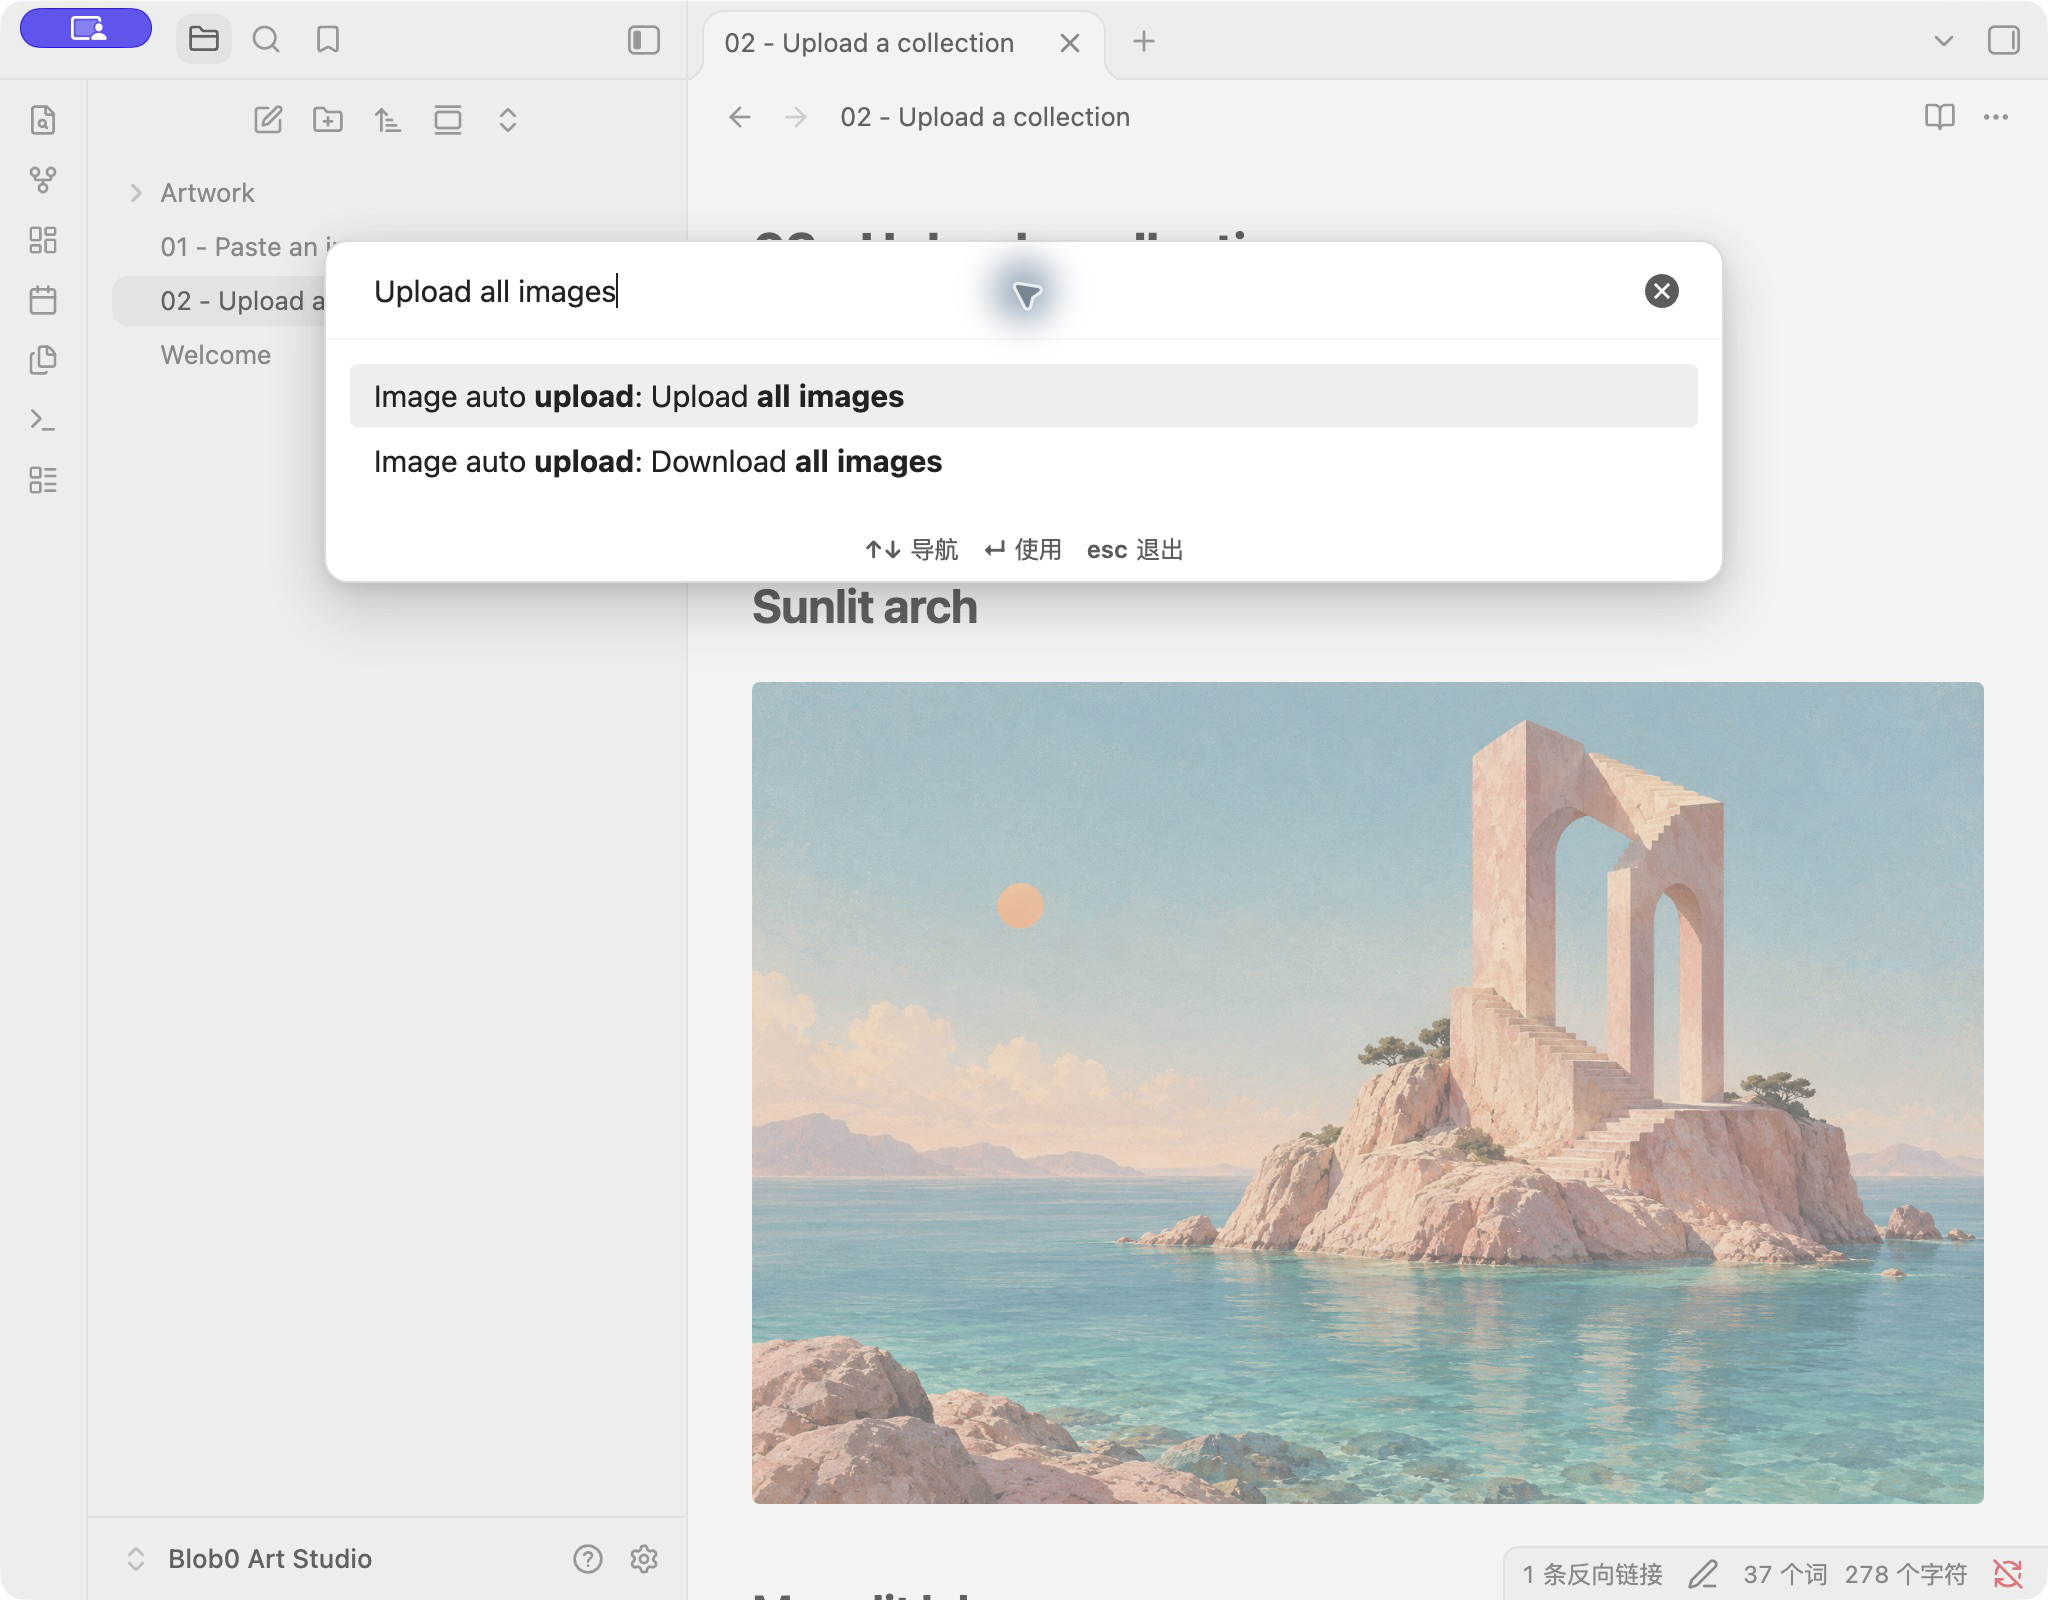
Open the Command palette with Command+P and run Image auto upload: Upload all images. The command processes local image attachments referenced by the current note.
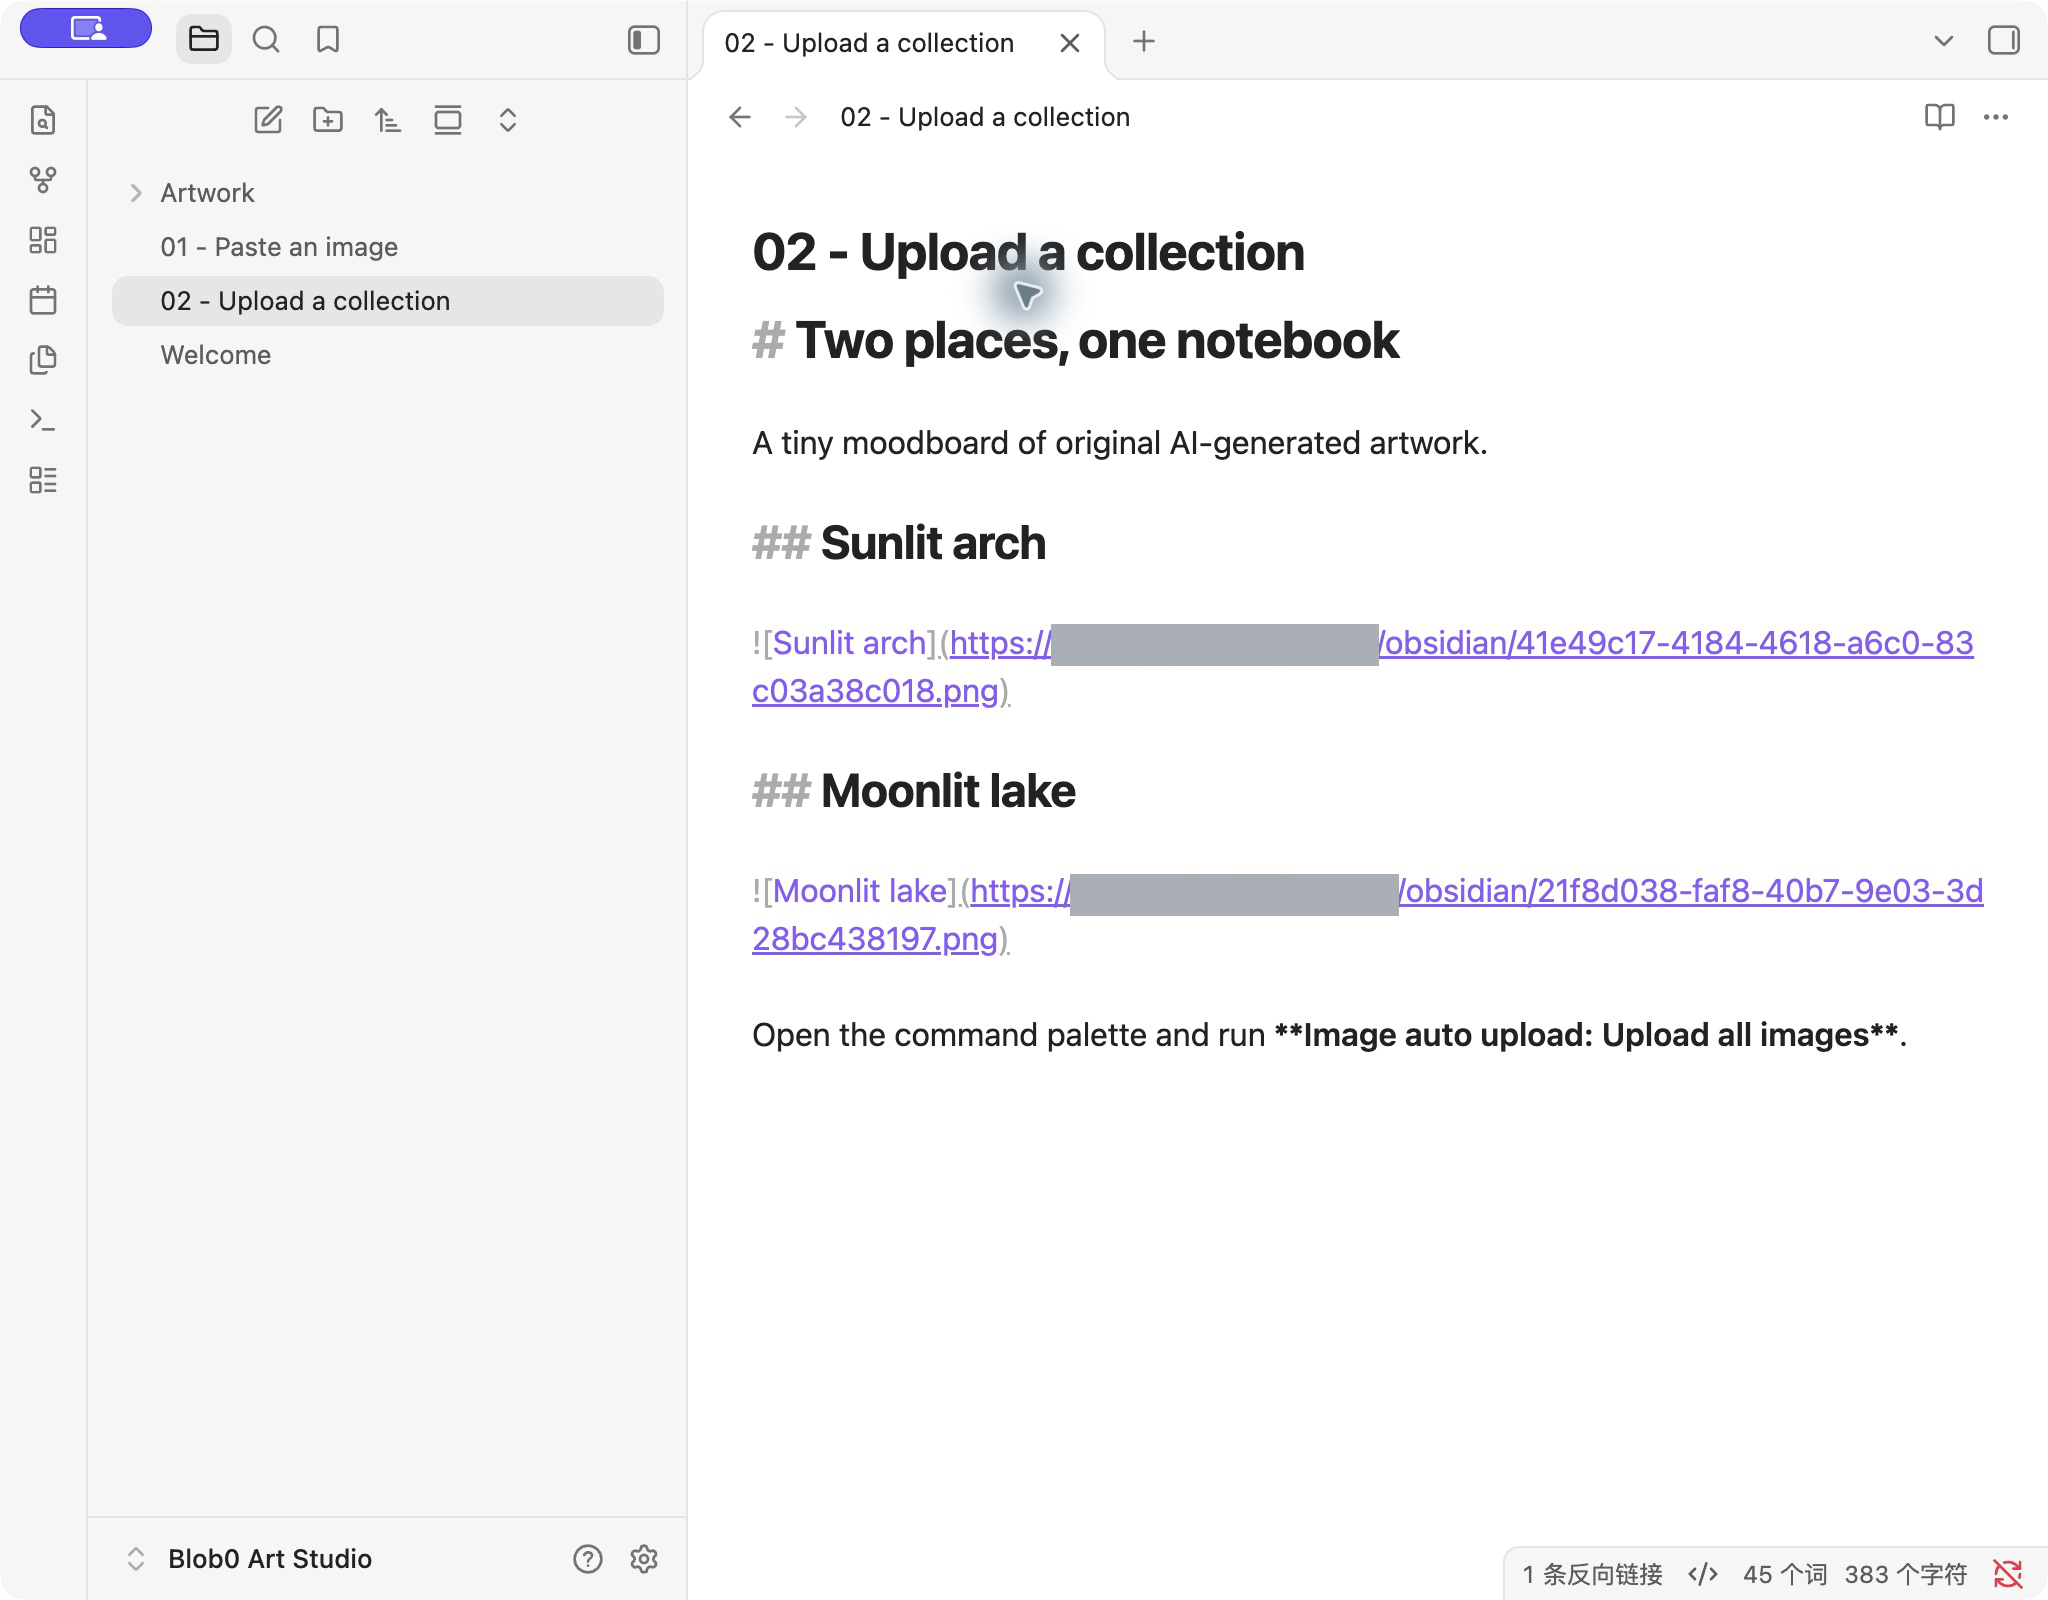
After the command, open Source mode using Toggle Live Preview/Source mode or the note’s More options → Source mode. Review the image references and confirm they use public object URLs. If an item fails, earlier uploads remain in storage; the batch does not roll them back. Check remaining local references before retrying.
Troubleshooting
- Connection refused
- In Blob0 Settings → Image Hosting, confirm Status is Running and keep Blob0 open. Run both apps on the same computer.
- 401 Unauthorized
- Copy the upload URL again in Blob0 and paste the complete value, including its secret, into PicGo server upload route.
- Upload succeeded, image does not display
- Check that the connection’s Public URL serves objects without login. Use that public image URL, not an S3 API endpoint or an expiring presigned URL.
Keep the local upload URL private
The service listens only on 127.0.0.1. The copied upload URL includes a private secret by default; keep it out of notes and screenshots. Notes should contain the public image URL, not the local upload URL or secret.
Typora compatibility
This walkthrough uses Obsidian. For editors such as Typora that require port 36677 and cannot supply a token, quit PicGo before changing the port and enable token-free access in Blob0. This allows any local app to upload without a token. Turn it off when you no longer need that integration.
Try the demo vault
Download Blob0 Art Studio to follow the paste and batch-upload steps. The archive contains three example notes and two original illustrations; it excludes Obsidian settings, plugin configuration, and access tokens. Configure your own Blob0 upload URL after opening the vault.
Download the demo vault (.zip)